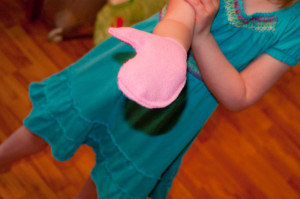
 My daughter has always wanted to be the most obscure things for Halloween. All of her costumes have stories that she creates. One year she wanted to be a purple “Fairy-Ladybug-Princess.” Apparently the Ladybug was a bug princess that had a magic spell on her making her a fairy too. Another year she asked to be a pot of gold. I love her creativity. Her latest obsession has been Carebears. I love it, when I was five I was a Carebear connoisseur as well. I was pretty jazzed when she requested being a Carebear this year. The biggest problem, is that you can’t find Carebear costumes at the store any more. We are about 30 years too late for that. Sure, you can find the patters on Ebay, but for a price. One that I was not willing to pay. Instead I went the DIY route.
Here is how you can make a Carebear Halloween costume on the cheap. You will need:
1 Sweat shirt in the color of your desired bear. Preferably a pullover, with no designs on it.
1 Matching set of sweat pants
1/2 yard of fleece that matches your sweatshirt and pants
1 sheet of white felt or a small piece of white fleece (you need just enough to make a circle the size of your child’s belly
Fabric paints and paint brushes to draw the “Belly Badge” on your costume
Fabric glue or a sewing machine. Whichever you are more comfortable with
First things first, lets make our Belly Badges. I used a big mixing bowl to trace a circle onto my white felt. Then I used Google to find a picture of the bear my daughter wanted. I used a pencil to lightly outline the design then followed with the fabric paints. This was really easy!
Use the fabric paints to paint a heart on the seat of the sweat pants. Can’t forget their butt hearts!
While that dries, have your child place their hand, fingers closed on your matching fleece. Use a pencil to get draw around their hand, giving you the shape of a mitten. Cut out four of these, leaving about 1/4 for the seams. Use the fabric glue to glue two hands together, then repeat with the remaining two.
For the ears, I used the matching fleece and cut out four ear shapes. Then I used some left over white felt to make the inner ears. I used the fabric glue to stick the white on the pink. Then I glued back pieces to the front ear pieces. Once the ears were dry I glued them to a pink head band using hot glue. You could absolutely use a beanie hat for this instead, but I couldn’t find one that matched, didn’t want to make my own, and my daughter doesn’t like hats. If your sweatshirt has a hood (score!) just attach the ears to the hood.
Finally, take your dried Belly Badge and glue it to the front of your sweatshirt. Let everything dry then have your little Carebear try it on!
On the big night we plan to use some lip liner to draw a heart on my daughter’s nose. If she will let me, we might attempt some white around her mouth and nose to resemble the Carebear snout.
Best part about this costume, is that if you live in a cool climate, its definitely warm. Especially with a layer or two underneath!
Some helpful hints
- If you can only find a sweat shirt that is a zip front, attach the Belly Badge on one side with fabric glue, or by sewing it. On the side that isn’t attached to the sweatshirt add some velcro to the back of the Belly Badge and the sweat shirt itself. That way it opens up like a flap so you can zip it.
- If you go the headband route for the ears like we did, try to find temporary hair color that matches your suit. It’s a fun little detail.
- If you don’t want to use this sweatshirt as a costume all the time, just attach the Belly Badge with safety pins. After Halloween is over you can reuse the sweatshirt.
-Stephanie Wright


